Posts mit dem Label DIY werden angezeigt. Alle Posts anzeigen

Samstag, 4. April 2015

Last Minute DIY Easter Gift Boxes Upcycled from Old Juice Boxes


Hey folks, hallo zusammen,

in case you still need to wrap your eggs and candies for tomorrow's egg hunt I have a great last-minute DIY idea for you.
In Austria it's tradition to hide Easter baskets for the kids (hopefully outside, if the weather is good enough). Those are usually single-use baskets made from cardboard. As I don't want to buy new baskets every year, that are highly probable thrown away directly after Easter, I last year decided to go a bit unconventional and to make my own Easter baskets from things I already have at home. Last year I folded origami Easter baskets using colourful magazine paper and this year I decided to turn some old juice cartons into Easter boxes. Those are no Easter baskets in the strict sense of the word but turned out really cute nevertheless, in my opinion. :)

falls ihr auch noch die Süßigkeiten und Eier für die morgige Eiersuche verpacken müsst, habe ich eine lustige Last-Minute DIY Idee für euch.
Gemäß der Tradition werden bei uns in der Familie zu Ostern für die Kinder Osterkörbchen versteckt (hoffentlich im Garten, wenn das Wetter mitspielt). Diese Körbchen sind normalerweise aus Karton und für den Einmalgebrauch bestimmt. Da ich aber keine besonders große Lust darauf habe, jedes Jahr neue Körbchen zu kaufen, die dann höchstwahrscheinlich direkt nach Ostern in der Mülltonne landen, habe ich letztes Jahr entschieden ein bisschen unkonventionell vorzugehen und meine eigenen Körbchen zu basteln und zwar aus Dingen, die ich bereits zu Hause habe. Letztes Jahr gabs daher selbstgefaltete Origami-Osterkörbchen aus buntem Magazinpapier und heuer habe ich mich dazu entschieden ein paar alte Saftkartons aufzupeppen. Die Osterboxen die so entstanden sind, sind zwar keine Körbchen im eigentlichen Sinn, sie sind aber meiner Meinung nach trotzdem ziemlich süß geworden. :)

Montag, 16. Februar 2015

10-Minute DIY: Jewelry Plate with Diamonds

Hello you lovelies, hallo ihr Lieben,

the last week was, this week and the next one will be crazy! I'll have to hand in two papers on Friday and study for a quite difficult exam I have next week. In addition I'm going to attend (what I believe will be) a pretty cool congress on sustainability "Good Life For All" over the weekend and have to hand in my regular TV-program for the bird's new nest. As you can see, I'm quite busy... :D Nevertheless, I managed to put together a little 10-minute DIY project in one of my study breaks yesterday (perfect occupation to relax!!), which I want to share with you today: a jewelry plate with diamonds. All you need is an empty white plate and a porcelain marker and you are ready to go! :)

die letzte Woche war sehr voll, und die nächsten beiden werden auch noch mal sehr busy! Bis Freitag muss ich zwei Uniarbeiten abgeben und nächste Woche wartet eine ziemlich anspruchsvolle Prüfung auf mich. Dazu werde ich am Wochenende zu einem (wie ich glaube ziemlich coolen) Kongress über Nachhaltigkeit gehen - "Gutes Leben für alle" - und außerdem muss ich irgendwo noch mein regelmäßiges Fernsehprogramm für the bird's new nest unterbringen. Ich bin also ziemlich gut beschäftigt momentan... :D Trotzdem habe ich gestern in einer meiner Lernpausen ein kleines 10-Minuten DIY-Projekt zusammengezaubert (perfekte Beschäftigung um abzuschalten!!), das ich heute mit euch teilen mag: einen Schmuckteller mit Diamanten. Alles was ihr dafür braucht, ist ein leeres, weißer Teller und einen Porzellanmarker, und schon könnt ihr loslegen! :)

Freitag, 6. Februar 2015

Little Key Bag with Lace


Hello everybody, Hallo ihr Lieben,

some of you might remember this post, where I bragged that I had many good ideas for DIY-projects with lace. As you can see, some months have passed but nothing really happened. :D This is going to change today, because I'm actually about to share a new little crafting project including lace, namely a little key bag made from fabric- and lace remnants. Of course you can adapt the size individually and also make a makeup bag, a pencil-case or something similar the same way.

einige von euch können sich vielleicht noch an diesen Post erinnern, wo ich ganz stolz damit geprahlt habe, dass ich noch einige gute Ideen für DIY-Projekte mit Spitze im Petto habe... Nun ja, wie wir alle sehen können, sind nun einige Monate vergangen und noch ist nicht viel passiert. :D Aber das wird sich jetzt ändern, denn heute habe ich tatsächlich wieder mal ein kleines Crafting-Projekt mit Spitze im Gepäck und zwar: ein Schlüsseltäschchen aus Stoff- und Spitzenresten. Natürlich kann man die Größe auch individuell adaptieren und nach Lust und Laune auch eine Kosmetiktasche, ein Federpennal oder ähnliches zaubern.

Montag, 22. Dezember 2014

Happy Holidays Garland


Hello everybody,

on Saturday Silke's and mine annual Christmas tea party took place at my apartment and as always it was lovely. We served scones, cake and chilli, tea and hot punch and of course we also decorated the apartment. Apart from other things (like a Christmas tree for example ;) ) I made a lovely and easy-to-make "Happy Holidays"-garland, for which I used simple green colour paper and an old newspaper. If you don't have a Christmas decoration yet, this garland might be perfect.

Samstag, 6. Dezember 2014

O(rigami) Christmas Tree!

Hello folks,

do you remember the newspaper Christmas tree balls I made last year? Well, as a huge paper lover I  decided to go with paper ornaments again this year. However, instead of cutting and stapling I chose folding this time. Yes, you guess right, we are talking origami ornaments for this Christmas. Among other things I folded classic Christmas tree ornaments and Santa boots and sticked to the classic Christmas colors red, white and green.

Sonntag, 30. November 2014

Branch advent calendar


Hey folks,

it's me - Lily! Long time no see! ;) Today I will show you in a little guest posting my this year's branch advent calendar which was super easy to make.

Montag, 10. November 2014

DIY Embroidered Greeting Cards

Hello everybody,

today I wanna share one of my favourite DIY-projects I've been up to lately: embroidered greeting cards. Although it is no half an hour project to make one of those cards and it will take you some time, I think the result is definitely worth the effort. In addition there are no limits to creativity concerning the selection of your motive. :)

Mittwoch, 29. Oktober 2014

Origami Bats and Pumpkin Garland


Hello everybody,

Halloween is just around the corner, so if you want to decorate your home it might be time to get started... ;) Today I'm gonna share a fast and easy to make garland with origami bats and pumpkins which won't take you longer than an hour to make.

Mittwoch, 15. Oktober 2014

Easy Autumn DIY Gift Wrapper

Hello everybody,

about two weeks ago a very good friend of mine had her 28th birthday. On Monday we finally met, so I could give her her birthday present. Of course the present needed to be wrapped too and I LOVE gift wrapping! I think it's always great fun to come up with a creative idea to wrap up a present instead of simply wrapping it in bought wrapping paper. This time I decided for an autumnal gift wrapper, fitting to the current season. It's really easy to make and won't take you more than 5 minutes.

Dienstag, 23. September 2014

Every Month Birthday Present

Hello you darling people,

last Sunday it was time to celebrate another birthday - mine in this case... ;)
I invited some friend over for brunch (which lasted for about 12 hours ;) ) and really had a fabulous day. For those of my guests who read this: THANK YOU again for joining me! It was a blast!
Of course I got some presents too and although all of them were pretty cool one stuck out especially for me. My oldest (and one of my best) friend Karin gave me an "Every Month Birthday"-present and as I liked the idea so much and guessed you might find it inspiring too I decided to share it here on the blog.

Samstag, 5. Juli 2014

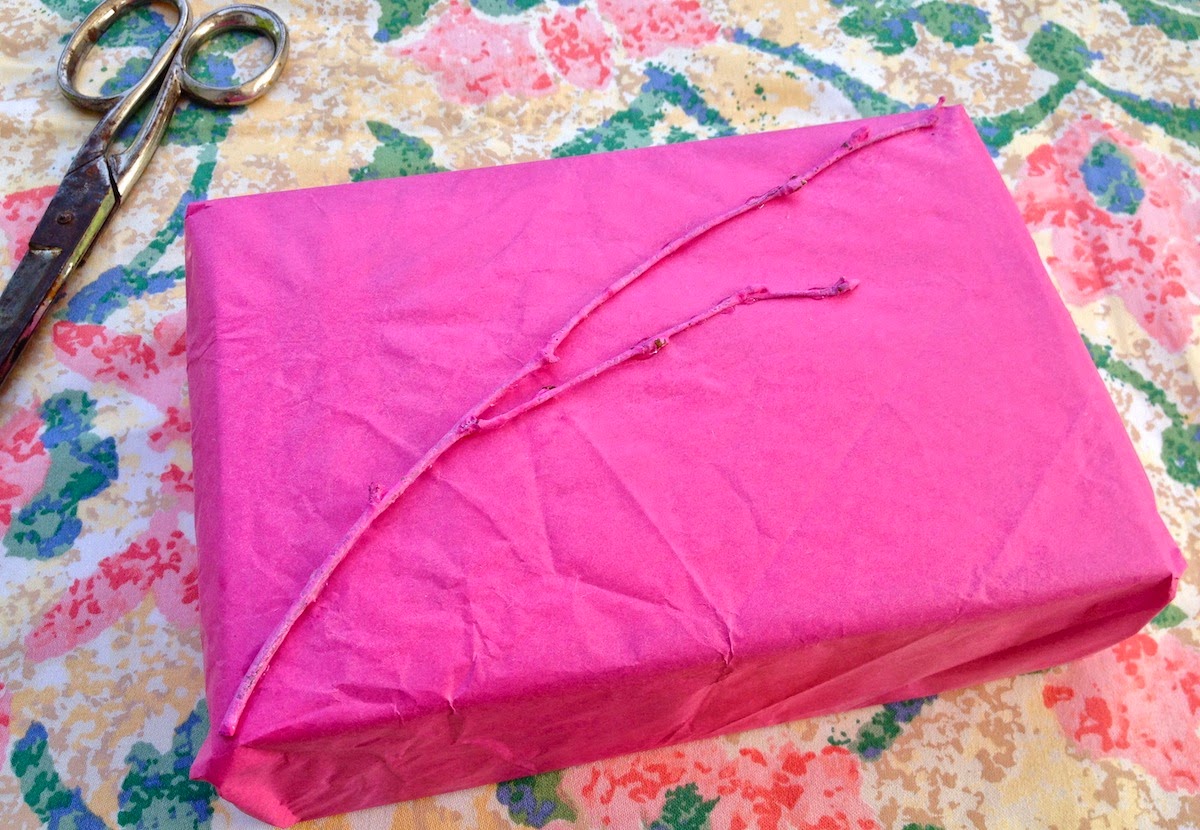
Gift Wrapping Idea: Tissue Paper plus Twigs plus Colour

Hi folks,

recently I helped myself to a new (beautiful) orchid, which happened to be wrapped in pink tissue paper. In addition two twigs were put in the pot as decoration. Both things, the tissue paper and the twigs, inspired me to a lovely gift wrapping idea that I wanted to share with you. :) It's really easy, but makes quite an impression.

What you'll need
  • tissue paper
  • twigs
  • spray paint in colour of tissue paper
  • glue (liquid)
  • scissors
  • adhesive tape 
How it works

First, wrap your present into the tissue paper.


Then, spray-paint the twigs and let them dry. Afterward cut them into pieces in the size of your choice and use the glue to fix them on your gift.


You can glue as many twigs on your present as you like. I chose two per gift to avoid the packages to look cluttered but that of course depends on the size of the gifts as well.


Have a great evening everybody!!

XOXO,
Tulip

Sonntag, 29. Juni 2014

Stylish Hangers For Your Stylish Wardrobe


Hello out there,

I am sure all of you know these beautiless clothes hangers out of wire which you always get when you pick up your clothes from the dry cleaner's. I have gathered quite a number of those over the last few years and they didn't make my wardrobe any more attractive. Therefore I decided to give them a little makeover and to cover them with remnants I had still left from former sewing projects. That's super easy and the finished hangers make quite an impression... ;)

What you'll need
  • clothes hangers out of wire
  • remnants
  • double-sided tape
  • scissors
  • needle and thread 
  • ironing board and iron

How it works

Cut your remnants into stripes (about 5 cm width and 1 m length). Press about 2 cm of one of the stripes' long sides and of both stripes' ends. 


Starting with the hook, cover the hangle with double-sided tape.


Wrap the fabric stripes around the hangle and fix the stripes' ends with a few stitches by hand. You'll need about two to three stripes for each hangle.


Done! :)


Have a great Sunday!

Yours,
Tulip

PS: I also added this post to Karly's and Paige's link up party on Karlys's lovely blog "Three in Three - Plus One". :)

All images by Stefanie Reichl

Freitag, 30. Mai 2014

Pimp Up Your Espadrilles


Hello everybody,

okay, I'll have to admit that I'm really proud of these black and gold babies. :) I simply think that the triangles give the espadrilles a very cool, and because they are gold, also very chic look. Besides, I love black and I love gold, so for me that's the perfect match.

What you'll need
  • black espadrilles (I got mine from H&M)
  • gold paint pen for dark fabrics
  • triangle
  • pencil
  • transparent and normal paper 
  • box cutter
  • scissors
  • pin

How it works

I started by stuffing my shoes with old newsprint. This way the espadrilles will keep their form when you paint the triangles on them.


For a start cover the toecap of one of the espadrilles with transparent paper and trace the outlinings of the toecap. Then cut it out and transfer it to a normal white sheet of paper. Now draw the triangles onto the shoecap. Either freehand or (what I preferred) with the help of straight lines and a triangle (I wanted a regular pattern on both shoes :) ).


Now cut out the triangles using a box cutter.


Cut out the paper toecap adding an extra cm to the actual contoures and pin it onto one of your espadrilles. Then colour the triangles with your gold pen (I did two layers of paint). Repeat that process with your other shoe.


Done! :)


Have a wonderful (and maybe crafty) weekend!

Yours,
Tulip

PS: I also added this post to Karly's and Paige's link up party on Paige's lovely blog "a dose of paige". :)

Donnerstag, 17. April 2014

Colourful Easter Eggs


Hello everybody,

it's still Easter week and therefore I'll bring you another little Easter DIY project: colourful Easter eggs.
To be completely honest with you, this project didn't turn out as originally planned... When I started with the eggs I realised that I hadn't bought self-adhesive crepe tape but only crepe tape and about five minutes later I found out that the colour I had bought didn't cover as well as I had hoped... Damn! But then I decided to simply improvise and I think the result is quite respectable, therefore I chose to share the Easter eggs anyways. I hope you like them as well! :)

What you'll need
  • blown-out eggs
  • acrylic paint in pastel shades
  • paintbrush
  • gift ribbon (ca. 20 cm/egg)
  • self-adhesive crepe tape
  • matches
How it works

The basic idea behind this Easter eggs is to colour just parts of the so that you can still see the natural colour of the eggs. For my first Easter egg I decided to colour half of the egg, therefore I fixed the crepe tape in the middle of the egg.


Then I painted the egg.


As already mentioned I found out really soon that the paint didn't really cover the egg as I wanted. Therefore I decided to give the colour a little structure by making very short strokes with my paintbrush in a regular pattern.


After the colour had dried I fixed the ribbon to the egg. To do so I attached the ribbon to a match by making a knot. Then I inserted the match into the egg.
When you pull the ribbon a little bit the match turns around and with that fix the ribbon. 


As you can see above, for my second egg I chose to colour only the lower part it and for my third egg I decided to leave a stripe in the middle.


Done! :)

All images by Stefanie Reichl

Dienstag, 15. April 2014

Origami Hen-Box as Easter Place Card Holder


Hello everybody,

Easter is approaching! In my family it's tradition to get together on Easter Sunday for a huge lunch at my mum's and usually it's my job to set the table and decorate a little bit. This year I decided to make table cards and a fitting table card holder and as it's Easter I thought that hens may be fitting. Furthermore I wanted to do something with origami so I browsed the internet for ideas and found these great origami hens by Origami Spirit. They are actually boxes which means that you can either put some sweets into them or as in our case a red egg which is an absolute necessity for playing "egg tapping" at the Easter lunch table... ;)

What you'll need
  • origami paper (20 x 20cm)
  • drawing paper
  • contour scissors
  • pencil 
  • triangle ruler
  • a nice pen

How it works

Fold your origami hens following the instructions of this very good instruction video:


At first the folding took me quite long but once I knew how to fold these little babies properly I needed about 8 minutes for one of them.   


For the place cards I used simple drawing paper. I simply drew them on the paper (63,5 x 4 cm) and cut them out with contour scissors to give them a nice frame. 


For the names I used a golden gel pen. Done! :)
 

All images by Stefanie Reichl

Sonntag, 6. April 2014

DIY Greeting Cards with Lace Pattern


Hello everybody,

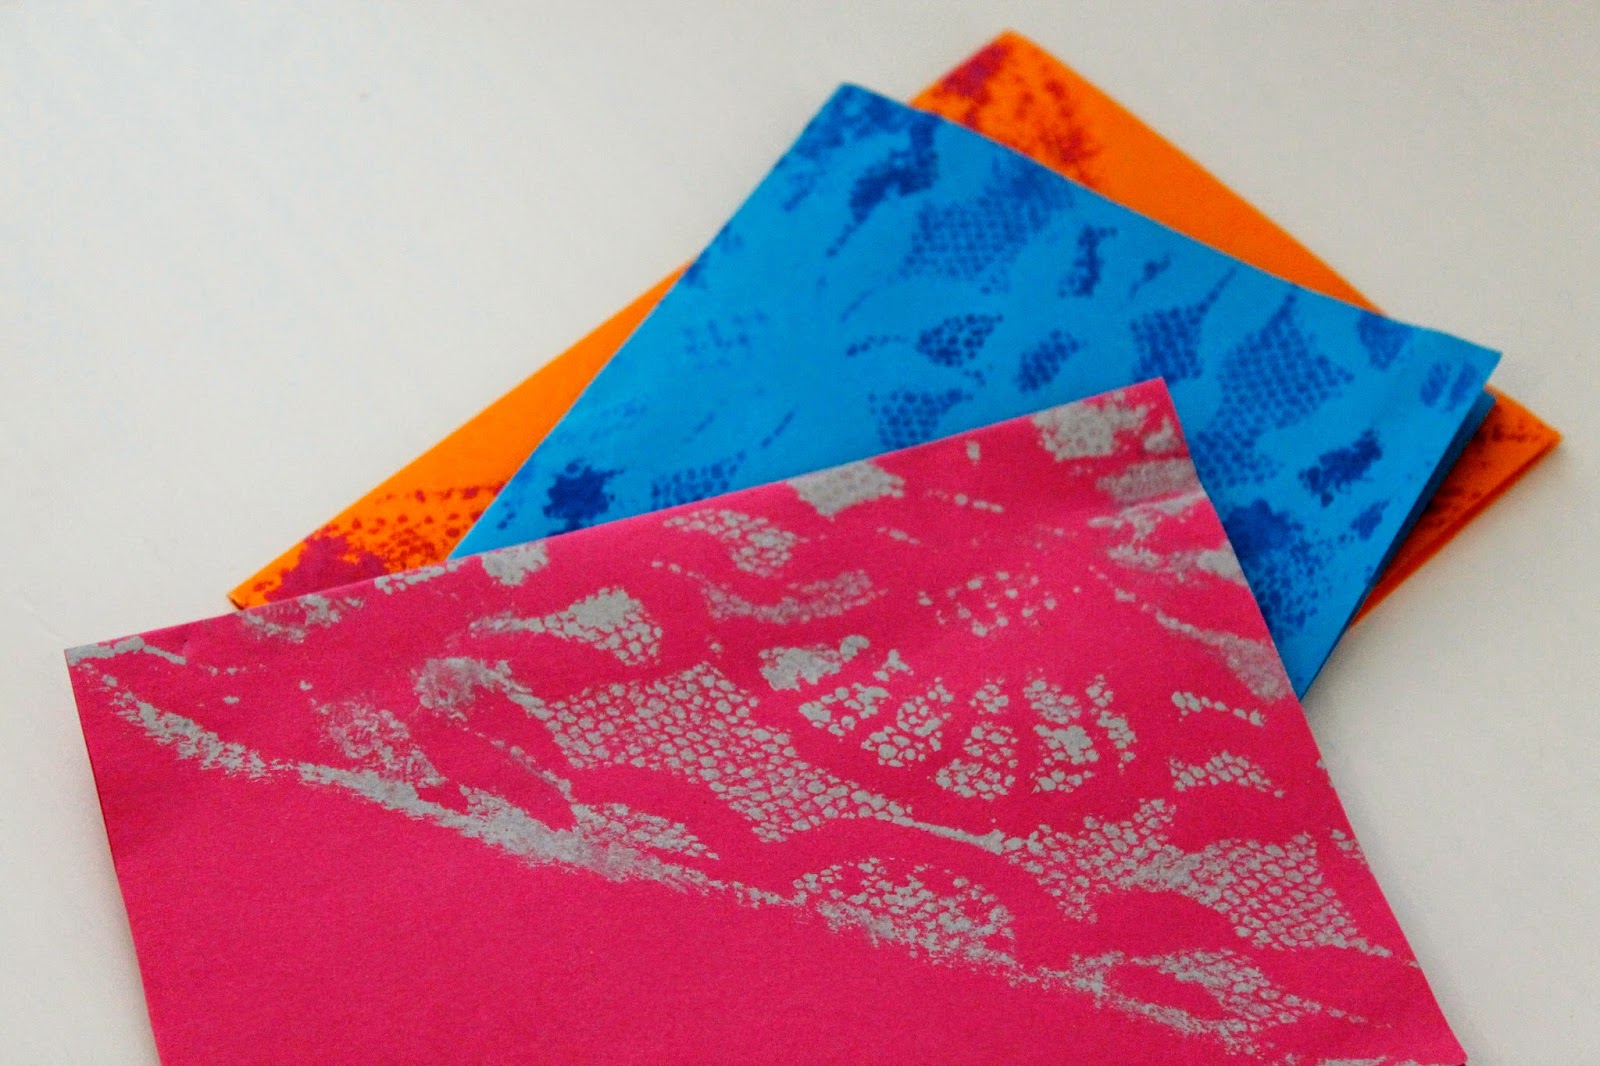
a few weeks ago I rummaged around in my fabric box and stumbled upon a piece of old lace and wondered what I could do with it. I've had a few nice ideas (there is more to come ;) ) but for a start I decided to use a piece of it to create some nice-looking greetings cards. They were very easy to make and most probably you'll also have everything at home you'll need for them (apart from the lace maybe). 

What you'll need
  • coloured paper
  • scissors
  • watercolours and brush
  • a small piece of lace or lace ribbon
  • paperclips

How it works

Cut out a DIN A5 (148mm x 210mm) sized piece of paper and fold it into half. Take your piece of lace and wrap it around the card. Fixate it with paperclips.
Dip the brush into the watercolour paint of your choice and dap it on the wrapped card.
IMPORTANT: The colour should be as dry as possible, otherwise the pattern will become blurred.


You can also only wrap half of the card or work with lace ribbon to create different kinds of pattern.


Done! :)


All images by Stefanie Reichl

Sonntag, 2. März 2014

DIY Holly Golightly Sleep Mask


Hi folks,

tonight is the night! :) And as watching the Oscars in Austria, which here start at about 2am in the morning, either means to sleep when it's still light or when it's again light outside I decided that I definitely needed a sleep mask to be able to fall asleep at all. And who wore the coolest sleep mask in film history? Exactly! Audrey Hepburn in "Breakfast at Tiffany's". Therefore I decided to make myself my personal Holly Golightly sleep mask.

What you'll need
  • piece of turquoise fabric (I used a thicker kind of jersey)
  • piece of fleece.
  • ca. 1,5 m gold ribbon
  • turquoise and gold/brown sewing thread
  • scissors
  • pins
  • needle
  • sleep mask template plus eye template (you can find loads of them via Google)
  • sewing machine 

How it works

Cut out the paper sleep mask and eye template and transfer it to your turquoise fabric (2 times or on double layered fabric). Add 1 cm seam allowance to your mask and to the upper bow of the eye. Then cut everything out. You should now have two masks and two eyes. In addition cut out one mask out of the fleece (without seem allowance).


Take one of your fabric eyes and sew a piece of gold ribbon (in the lenghts of the lower bow of the eye) on it. Do the same with the other eye. Then take one of your mask pieces and stitch the eyes onto the right side of it (by hand).


Lay the front side of the mask on the back side of the mask, wrong sides facing. Put two pieces of gold ribbon (each about 50cm long) between the two pieces of fabric so that the longer parts of the ribbons are inside the mask. Then pin the two sides together and stitch them together leaving an about 5cm hole.


Make some short cuts into the seam allowance. Turn around the mask and put the fleece into it. Then close the hole by hand.


In a last step pin the remaining gold ribbon onto the front side of your mask and stitch it on using a brown/gold upper thread and a turquoise bobbin thread. 


Done!


 All images by Stefanie Reichl
Related Posts Plugin for WordPress, Blogger...